Friday, January 27, 2012

From Primer to...

The primer look is gone, replaced with an Almond Paste (Olympic paints) color.

Primer in the kitchen

Almond Paste in the kitchen
And primer in the front room

Replaced by the (yawn) Almond Paste.

We used this color for most of the house in South Carolina, and it was pretty okay. It did offer a contrast with the white trim, and didn't clash with anything we had. So I thought it might be a good place to start when looking for a new color for the previously-chocolate-brown wall.

Nope. Hate it! I don't think I'll even put a second coat on. I might finish off the darker wall to the right in the front room - since it has another little problem:
Whoops!
The paint wasn't adhering correctly...okay, it was peeling. And so I just had to peel it! What could I do otherwise, right? Right?!? So I might have to fix that. At least until I find the right color paint for this room.

Which might take a long while, considering how much I hate boring and how much Doug wants boring. Hm.

Friday, January 13, 2012

More Curtain Rod-ish-ness

Now that the kitchen is under control, it's time to take on the fishbowl at the front of our home.

That's right: the front room windows. They have been blankly staring into our front room since we moved in, flatly refusing to easily mold to any curtain hardware. Doug has kindly offered to bend a piece of pipe to fit the space, leaving us only to find the hardware. This actually looked like a very attractive option for a long while.

It does require some cash for the pipe, a trip north to visit a metal shop he has access to (sometimes, when his brother is in a good mood), and another trip to the store to get the hardware.

And, after many months of letting the neighbors peep - it's a good thing I like our neighbors - I finally came up with another (cheaper) way of getting it done.

We purchased four Walmart special curtain rods. The smallest rod size is 28", and there are two windows that need 27". If I use the pipes separately, instead of nesting them inside of each other, the rods should fit just fine.

Then I can hang them. Again with the decision on where to hang them! I like curtains at ceiling level (as I have said before), but this ceiling is not going to be cooperative. See that? Argh. I don't want them right above the windows, especially since I eventually want to trim those windows out the wazoo.

So. I am going to split the difference, once again making the need for a custom-length curtain. Digging into my stash, there are enough curtains (84") to take the window to the first level. Then I have another set of curtains in a slightly more opaque fabric, same color, that I can use to band the curtains at the bottom. My, oh my, looks like a lot of sewing for me this week!
See how the ceiling angles away? Not exactly conducive to curtains...
And I got material for Bonnie's curtains - did I mention that? Maybe that will have to wait until next week...

Thursday, January 12, 2012

It's Curtains for You!

Subtitle: Hangings are up in the Hales' household. Children involved.
Not happy that mama is busy
I have functional curtain rods in my kitchen. There are no curtains on those rods, though.

After measuring, I knew that these curtains needed to be 42" long - not a standard size in anyone's books. My extra curtains are many, but none of them fit that length requirement, and I'm not willing to cut any of them down at the moment.

So I turned to my craft and fabric stash - there must be enough fabric in my three large boxes of fabric for a set of curtains, right? Well, that is almost true - there's enough for one pair, but I have two windows. The fabric is quite wide, though, so by splitting each panel in half and adding a different fabric as an embellishment on the sides, they should do quite well.

Next I had to decide what type of curtain I wanted, since I had three types under consideration (these being the easiest to make): tab-top, regular rod panels, and clip-on curtains. The first is already out, since I don't like tab-top curtains much these days. The clip-on won simply because these curtains will be opened and closed at least once or twice per day. Using the rod pocket would look more elegant, but wouldn't function very well. Those rods are well out of easy reach, so fussing with the curtains on a more-than-daily basis would drive me nuts.

Next comes the annoying part - trying to get a straight line when cutting my curtains. I measured 42" inches long, then added several inches for the top and bottom. Honestly, I like using my husband's square to get this right. There's got to be an easier way (and if you know of one, feel free to clue me in).

Okay, curtains cut out. Then I decided I wanted them lined. And since they are fairly narrow, an extra band on either side would come in handy. So I cut strips for the sides and sewed them together, then folded them over to match the seam in the back.


Actually, this was when I decided I wanted lining. The fabric will be in my kitchen windows, easily seen from the backyard. And I really don't want to look at the back of this fabric at any time. So I cut (with the large drywall square) linings in the finished size of the curtains, and placed them on the back of my curtains.

Finally, I was able to sew the sides closed.

Then I turned down the top - since these are going to clip onto rings, this curtain doesn't need a rod pocket.
Measuring to make sure it's even and whatnot

Turning it under so that everything looks nice
Then I did a fitting. Silly, I suppose, but I wasn't quite sure how much space those curtain rings were going to take. So I hung the curtains and pinned up the hem, then did the bottom the same way as the top. I like at least four inches turned up on the bottom - makes the curtains look a little more substantial.

So now - voila! - I have curtains in my kitchen. Nice, heavy curtains. No more sun shining in my eyes in the afternoons! As a bonus, the echo in the kitchen is gone, and it feels so much warmer in there. Oh, how I love curtains. It was even worth the few minutes of Sophia looking so pathetic.


Monday, January 9, 2012

The Curtain Rod Conundrum

Sorry, I just love the word "conundrum".

And it really was. A conundrum, that is.

Way back in summer, I purchased two curtain rods and a curtain rod connector online. The windows measure 47" across. I want approximately 1/2" on either side of the window, so a 48" curtain rod seemed the way to go. Especially since I knew I'd be using the connector to meet the rods in the corner, which should take another inch or so. So they were ordered. And stuffed into a closet.

Here we are several months later. Every day at approximately 3:30 pm, the sun shines directly into my kitchen windows. And stays there until about 5:30 pm. This is the same time I am trying to get kids snacks, work through three sets of homework papers, and make dinner, usually with Sophie begging to be held most of the time.

Being blinded by the sun at the same time is not working for me. So this weekend I determined that the languishing curtain rods in the back of Sophia's closet should be put to work.

I cleared off the counters (or rather, cleared enough so that I could reach the windows and the wall above them, and tried to decide first 
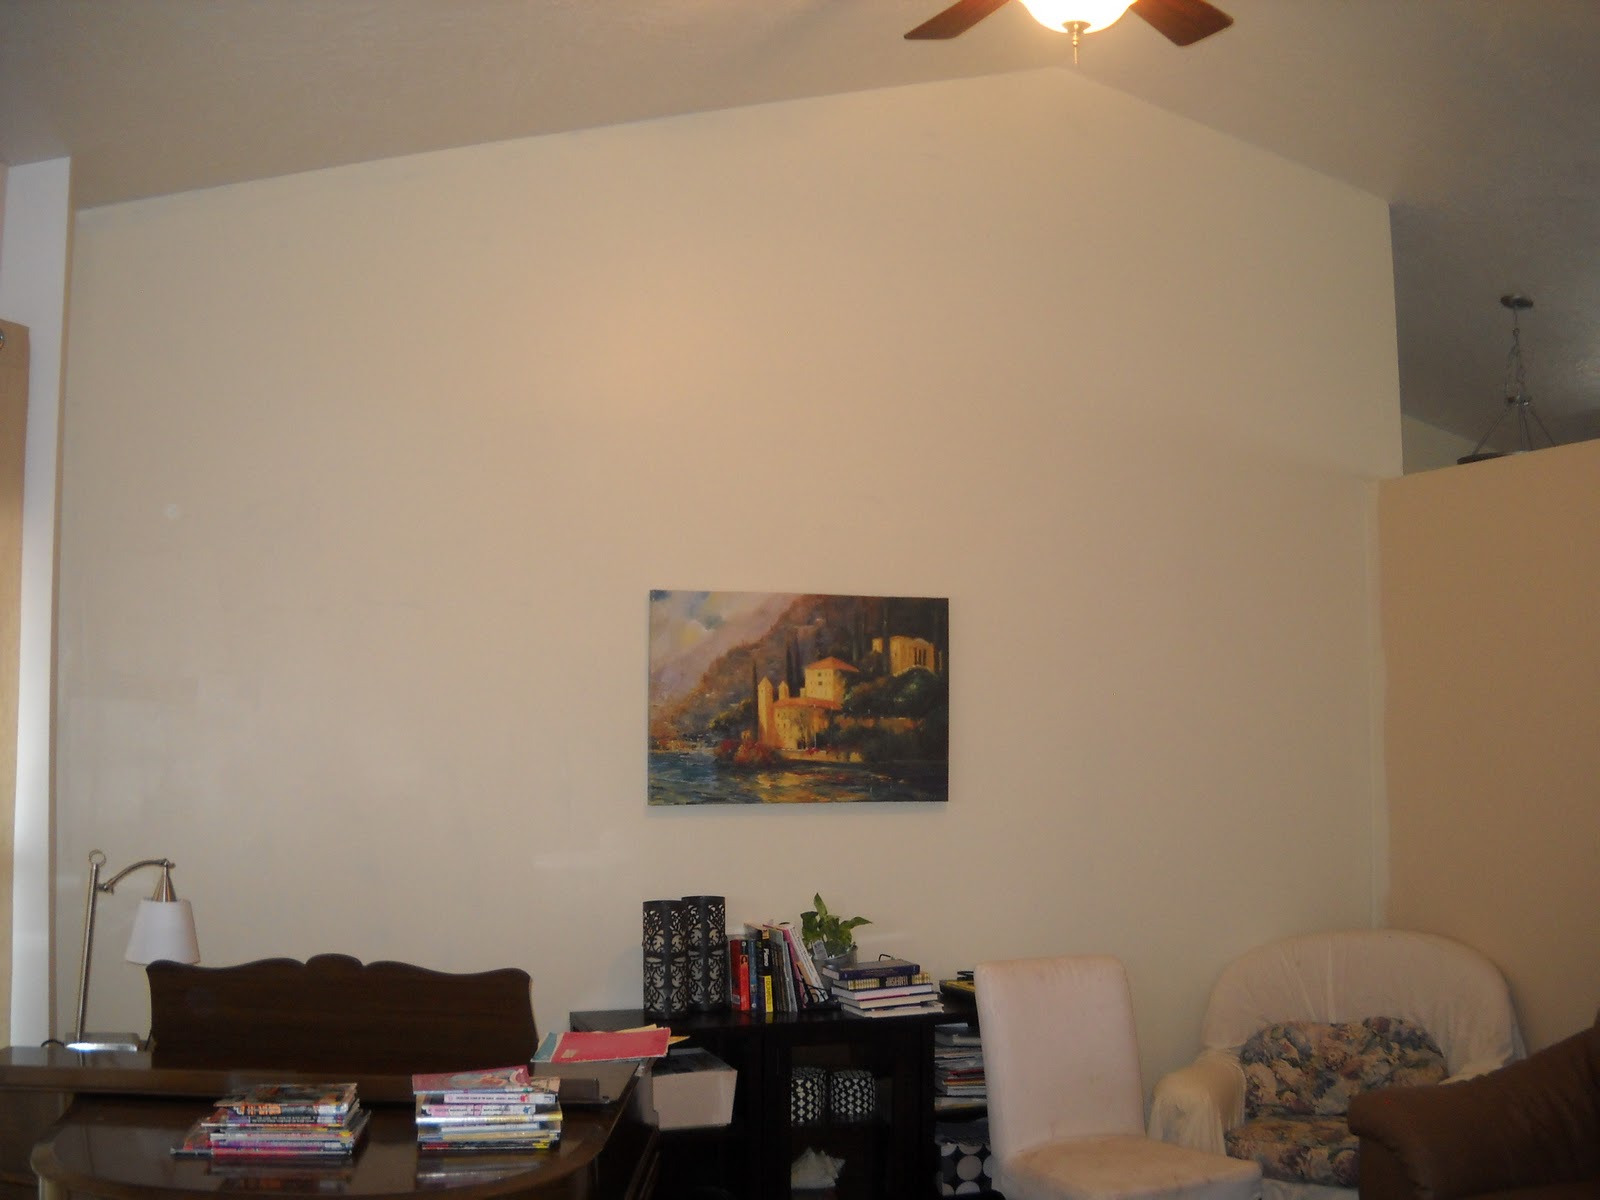
where to put those rods. I decided to match the start of the cabinet molding, which was 8" above the window. I measured up because, in my experience, ceilings are not really reliable as measuring points. I decided to match the molding because a) with clip-on or tab-top curtains, the sun won't get in; b) with regular curtains, the fringe at top would hit the ceiling (my favorite spot for curtains is at the ceiling); and c) the moldings didn't really leave enough room for the rods to be up near the ceiling (that look would have actually left the sides of the windows without curtains - no way).
You can see here that ceiling height isn't going to work

The right height - right where the molding starts.
Easy to see on this picture, since it isn't trimmed, yes?
Decision made, I went to work with a step ladder and my darling husband's drill. Stored all the way out in the shop, but I gotta get out of the house sometime, right? The hardware went up fairly easily - there were studs behind the drywall at those not-so-randomly-chosen points, so I didn't even need drywall anchors (whew!). They are a little screwy (pun intended), but these are the cool hardware pieces that can be fiddled with until your curtains hang levelly, even when not put on absolutely level.

My kind of hardware.

Then I put up the rods. Here comes the conundrum - the rods are actually 51" at their smallest. Seriously?  They don't fit. Now what?, I asked myself. I bought those rods specifically to work with the connectors, which require an empty curtain rod. Another problem - just to stack them all up together - is that the rounded finials (those little do-dads on the end of the rod) do not look good with all the angles in the kitchen.
Fabulous. Way too long.
A little further back, for perspective...
...And the other side is hiding because it is also too long.
Add on the lovely finial that doesn't match...
(and let's not even mention the molding that isn't cut to size courtesy of the previous owner)

So. Not wanting to spend any more money, I looked at what I had. I did have some 24" - 48" silver rods in my bedroom that are actually a mite too small for those windows, and spend most of their time barely hanging onto the curtains they are holding.
Sad, saggy hardware
They are Walmart specials and aren't all that special, but they do have square finials that recall the molding on the kitchen cabinets. So I pulled those and tried them. They fit! What's even better? The good curtain rods hold up my curtains in my bedroom correctly, no sagging involved.
Much happier!
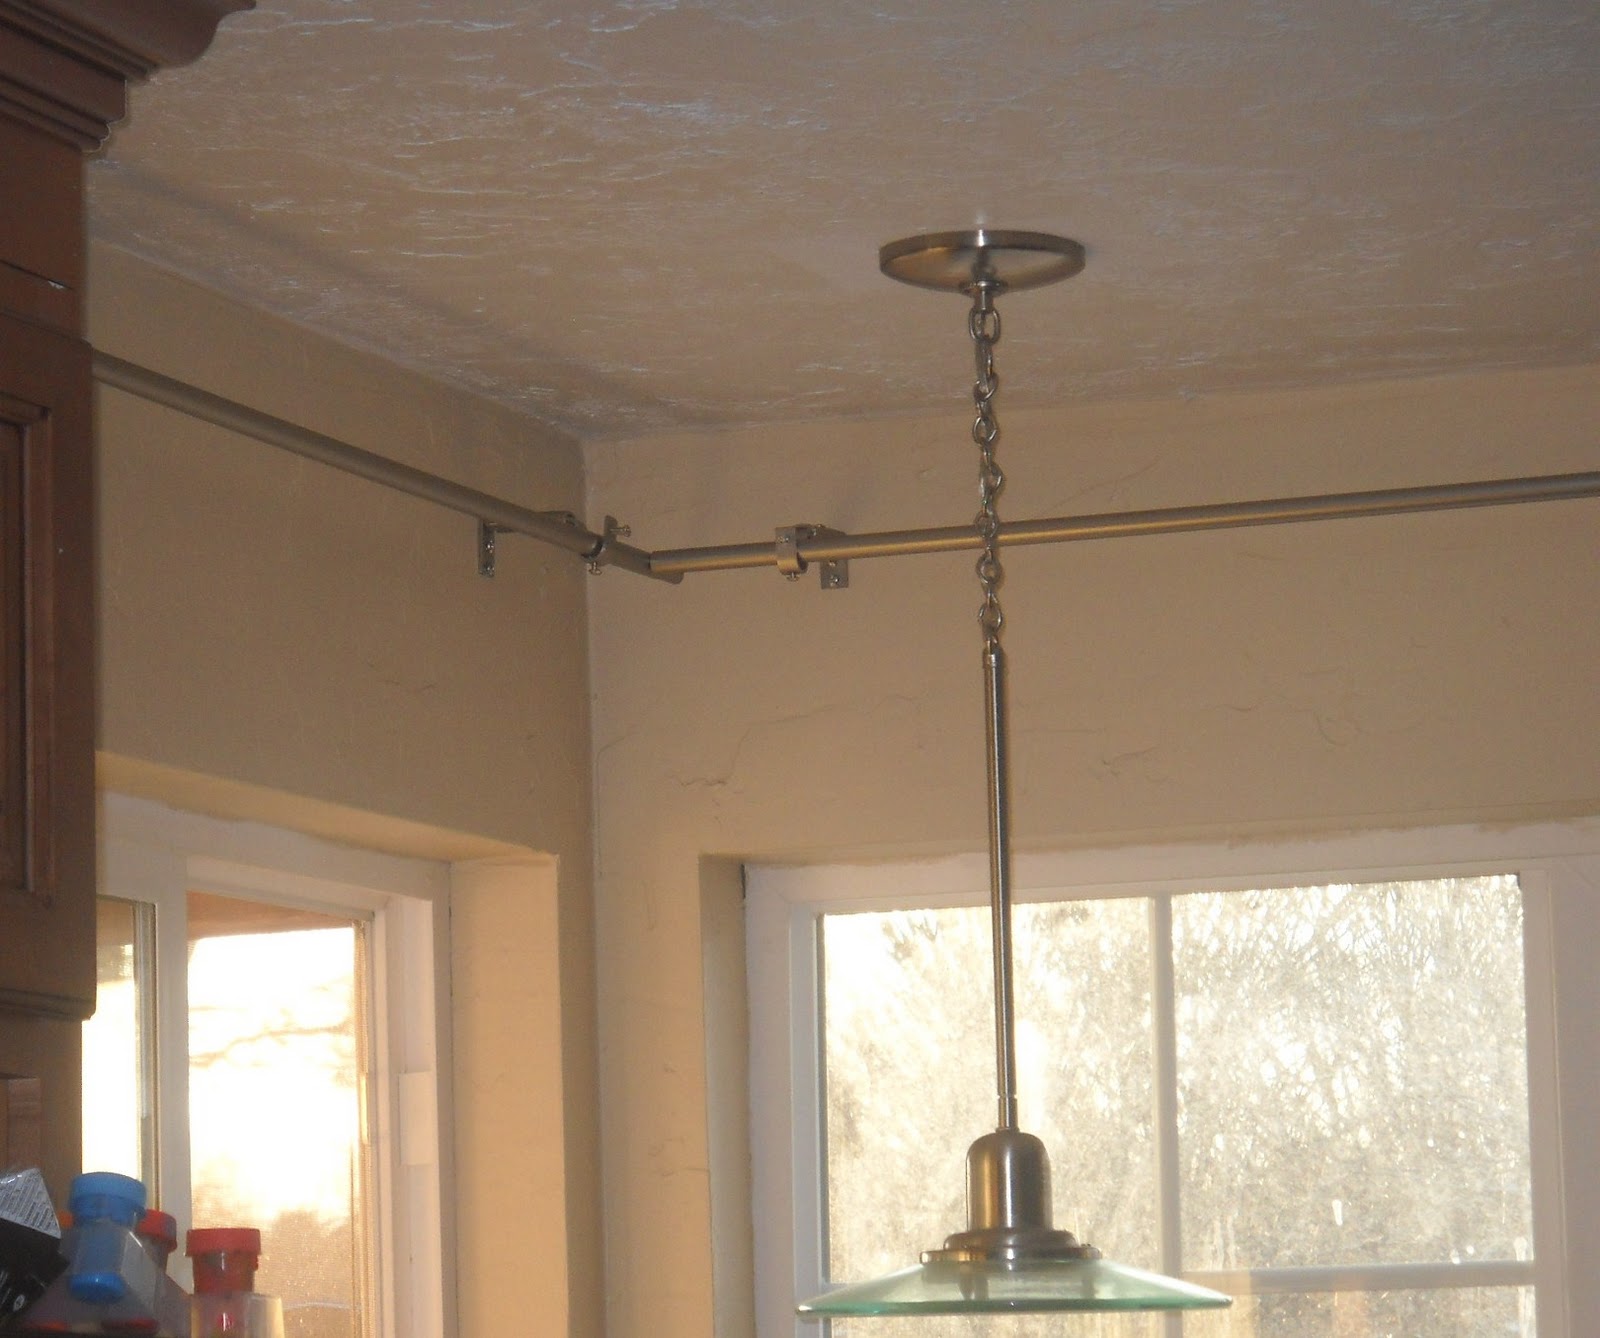
The Walmart specials didn't have a hollow end, though - they had a plastic whatnot keeping the finial in place. So I yanked that sucker out of there, and voila! An empty pipe the correct side for the connector piece. Way more work than I needed on a Friday afternoon, let me tell you. So it ended up being "leftover night" and I still hadn't started on curtains. More on that soon.

But at least I have a curtain rod that is functional and in place. Whew!
A happy connector
And the rod isn't even hiding behind that nasty molding anymore.

Tuesday, January 3, 2012

We Didn't Paint!!!


It's very strange to finish the holiday season without something having been painted. And, amazingly enough, I am not planning on painting soon.

My guests for the holiday admitted they didn't really feel the holiday spirit without the smell of paint fumes. Sad, but true.

I did, however, find some great inspiration for my bedroom. This was from the Elle Decor magazine, in an ad from Caravan Modern Couture Rugs. There isn't a showroom anywhere nearby, but! This should be enough to go on when I do start painting.

Pinned Image
Imagine this pattern with a soft gray background, a silvery pattern thread and the entire wall "pearlized".

Maybe I should invite my holiday guests back to "do it right"? Maybe they were grateful to miss the paint fumes? Probably the latter.