 |
| Not happy that mama is busy |
After measuring, I knew that these curtains needed to be 42" long - not a standard size in anyone's books. My extra curtains are many, but none of them fit that length requirement, and I'm not willing to cut any of them down at the moment.
So I turned to my craft and fabric stash - there must be enough fabric in my three large boxes of fabric for a set of curtains, right? Well, that is almost true - there's enough for one pair, but I have two windows. The fabric is quite wide, though, so by splitting each panel in half and adding a different fabric as an embellishment on the sides, they should do quite well.
Next I had to decide what type of curtain I wanted, since I had three types under consideration (these being the easiest to make): tab-top, regular rod panels, and clip-on curtains. The first is already out, since I don't like tab-top curtains much these days. The clip-on won simply because these curtains will be opened and closed at least once or twice per day. Using the rod pocket would look more elegant, but wouldn't function very well. Those rods are well out of easy reach, so fussing with the curtains on a more-than-daily basis would drive me nuts.
Next comes the annoying part - trying to get a straight line when cutting my curtains. I measured 42" inches long, then added several inches for the top and bottom. Honestly, I like using my husband's square to get this right. There's got to be an easier way (and if you know of one, feel free to clue me in).
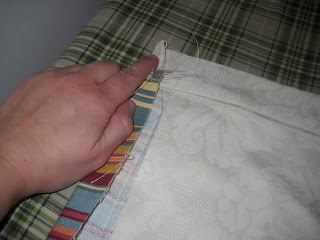
Okay, curtains cut out. Then I decided I wanted them lined. And since they are fairly narrow, an extra band on either side would come in handy. So I cut strips for the sides and sewed them together, then folded them over to match the seam in the back.
Actually, this was when I decided I wanted lining. The fabric will be in my kitchen windows, easily seen from the backyard. And I really don't want to look at the back of this fabric at any time. So I cut (with the large drywall square) linings in the finished size of the curtains, and placed them on the back of my curtains.
Finally, I was able to sew the sides closed.
Then I turned down the top - since these are going to clip onto rings, this curtain doesn't need a rod pocket.
 |
| Measuring to make sure it's even and whatnot |
 |
| Turning it under so that everything looks nice |
So now - voila! - I have curtains in my kitchen. Nice, heavy curtains. No more sun shining in my eyes in the afternoons! As a bonus, the echo in the kitchen is gone, and it feels so much warmer in there. Oh, how I love curtains. It was even worth the few minutes of Sophia looking so pathetic.


Wow, those look really nice! I especially like the warm glow from the sun outside :) And the pitcher of flowers in the corner. Very pretty!
ReplyDeleteAs for using Doug's drywall square, if you look in Hobby Lobby or JoAnn's, they have the same exact thing only it's a 'sewing square'. Use what you have, by all means! :)
Glad to hear that I'm not trying to invent an easier way and ending up doing it an even harder way! A drywall square it is! :)
ReplyDelete