Sophie would actually love to help, but...we'll wait a few years on that. My sister took this picture, and it was too cute not to share.
Back to the DIY stuff. Inspired by Bonnie's sanding, puttying and painting, I decided it was time for me to tackle a furniture job as well.
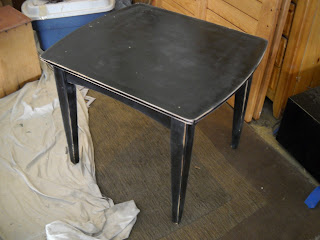
This was also a yard sale find, but it cost $10. It was also in much better shape than Bonnie's desk. Originally, it was intended for the guest room, since there isn't a bedside table. But the guests for the wedding are long gone, so perhaps it was time to think of a new place to put it. The front room, for example. It is rather dark in there. And I have two chairs that I'm (still) working on reupholstering. A table between them would look very fetching. Of course, there's also a couch in there now, too...hm, time to think about moving things around.
So I started by sanding and priming, of course.
That done, it was time to paint the bottom white. With the gray-green walls, I've decided I need to add more items that are white (or at least lighter than say, black). I just tipped it upside-down and painted just the legs and the underside of the top.
Then I started researching decoupage, the art of putting paper on furniture, walls, or other items. And looking for paper to put on the top. I found the coolest wallpaper online. Sadly, I only needed a little piece, but it was only sold in double rolls. Which ended up being around $35. Yikes. This wallpaper, therefore, might be part of many projects coming up. Good thing I like it as much (or more) in person as I did on the web.
According to About.com, I needed to make a pattern out of tissue paper. Which I did:
Then I cut it out of the paper:
See? Super cool wallpaper. The first piece I cut out Did Not Fit. Which led me to my own idea (always a dangerous thing) of putting the wallpaper on the top and then dealing with it later. Here was my friend throughout the process:
Oh yeah, Mod Podge. I had a coupon, so it only cost me $4. I rolled it onto the table, then positioned the paper.
Yup, kitchen counters are great for this sort of thing. Then I worked feverishly to get rid of bubbles, and added another layer of Mod Podge on top. After it had dried, I realized that Doug's favorite chef knife was just lying there, begging me to make use of it. With knife in hand, I quickly and easily cut off the extra paper. Voila, no pattern-making involved! Doug did, however, note dryly that a razor blade would have worked just as well.
Whatever, Mr. Love-My-Knife.
The biggest bummer was that the wallpaper was not wide enough for the table. To make the pattern look good, I ended up with not one, but two seams. Argh.
Then I painted the edges black with acrylic paint, and covered the whole thing with polyurethane. Or rather, Doug did. The lid on the can was so tight he had to use pliers to get it open, and by the time he opened it for me, I was long asleep. So he put it on for me. What a great guy.
And now, here are the results:
I even moved the entire front room around to make room for it. A friend came over shorty thereafter, and the only thing she noticed was the table.
Maybe because the chairs are still un-reupholstered? ; )


That is really pretty! Good job! and kudos to Doug for stepping in and finishing up so you could sleep!!
ReplyDeleteSophie is so cute, and I love that paper, too!
ReplyDeleteYou can comment now! Must be the new computer. If you want me to do a table for you, just let me know! :)
DeleteIt's my iPad, haven't tried on th e new computer. But where would I put another table? Maybe I need my grey file cabilnet decopauged
ReplyDeleteGood point. Your grey file cabinet is a good idea! I have tons of this left over - I could send it to you if you're keen on the idea. : )
Delete